
!["[New] 2024 Approved Bridging Fashion & Filmmaking OOTD Tips for Mac Users"](https://www.lifewire.com/thmb/A0XVxUlV8ojxNxMwxZO61wFI45o=/400x300/filters:no_upscale():max_bytes(150000):strip_icc()/ScreenShot2021-01-08at1.14.03PM-c8985aaab2454a16a2969d69bbc95867.png)
"[New] 2024 Approved Bridging Fashion & Filmmaking OOTD Tips for Mac Users"
Bridging Fashion & Filmmaking: OOTD Tips for Mac Users
How to Make an OOTD Tiktok Video on Mac

Shanoon Cox
Oct 26, 2023• Proven solutions
Do you ever wonder how to make a cool OOTD Tiktok video on Mac? Don’t worry, This article has you covered!! OOTD Styling is at the core of tens of thousands of joyful TikTok video clips. Hugely common with apps like TikTok, such forms of transformation videos are content creator strength.
Once upon a time, anyone asking for fashion tips will have to brace for a weekly magazine to come in the mailbox. Now, due to the rise of social media, open clothing content is almost immediately available, and—then here’s the very cool thing—you can be a part of making it too.
Living entirely in video form, TikTok gives you the ability to display your individuality and the ways clothing shifts toward a picture frozen in time. Plus, the app’s uniqueness is how you don’t need to personalize highly edited, great video. Each TikTok generated is genuine and endearing to viewers, a significant feature for anyone searching for interactive guidance to their style game.
How do TikTokers make an OOTD TikTok video on Mac and edit their videos? Let’s find out in this article.
What You Probably Need
The following aspects are key to making an excellent OOTD video for Tiktok on Mac:
• Great lighting (it is best to do so from a window!)
• A tripod
• 5-10 outfits
• Modifications of Outfit
• A ring light maybe
• Your camera phone
• Free software for editing videos like Filmora X
Who You Can Follow for Reference
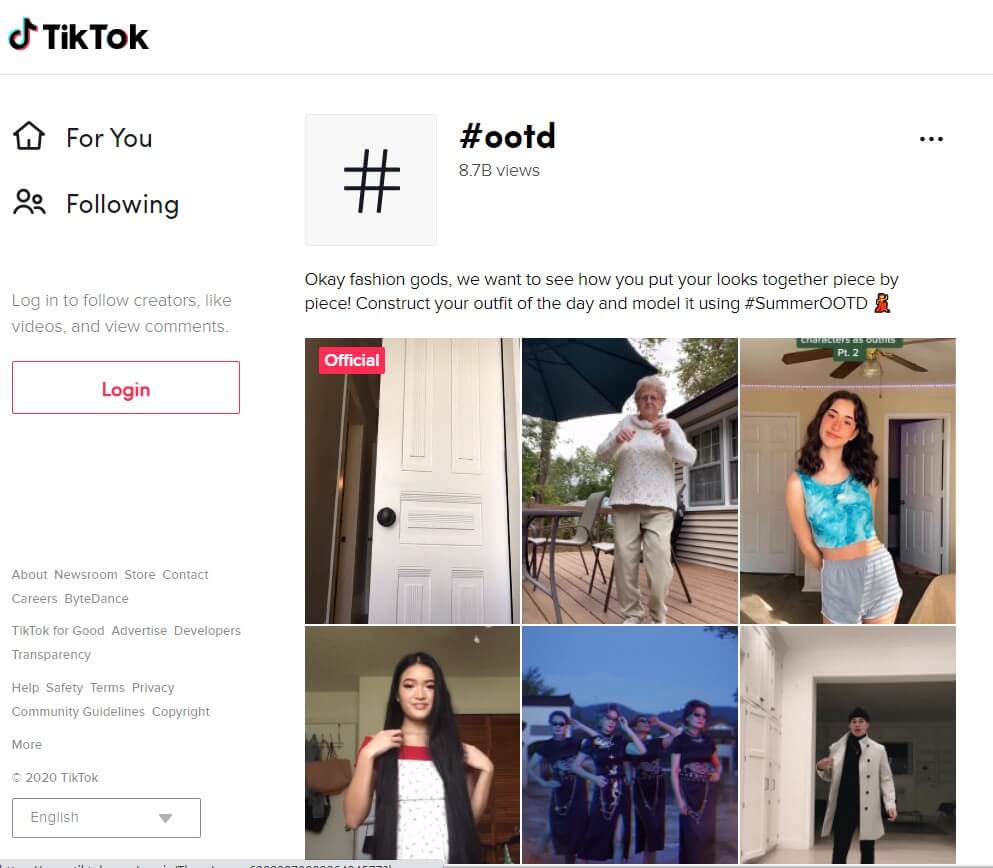
Tiktok is a host to some outstanding fashionistas, Here is a couple to track to keep up to date with the newest trends and OOTD TikTokers:
@leoniehanne

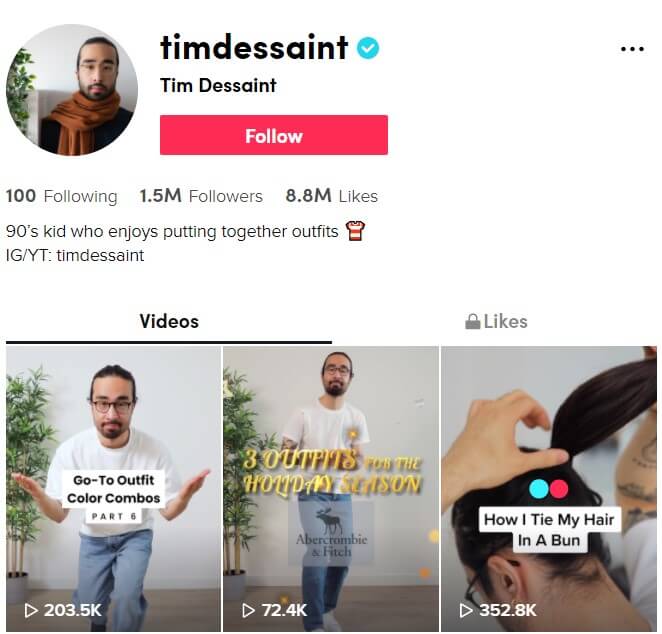
@timdessaint
@imdanielsimmons

@estare

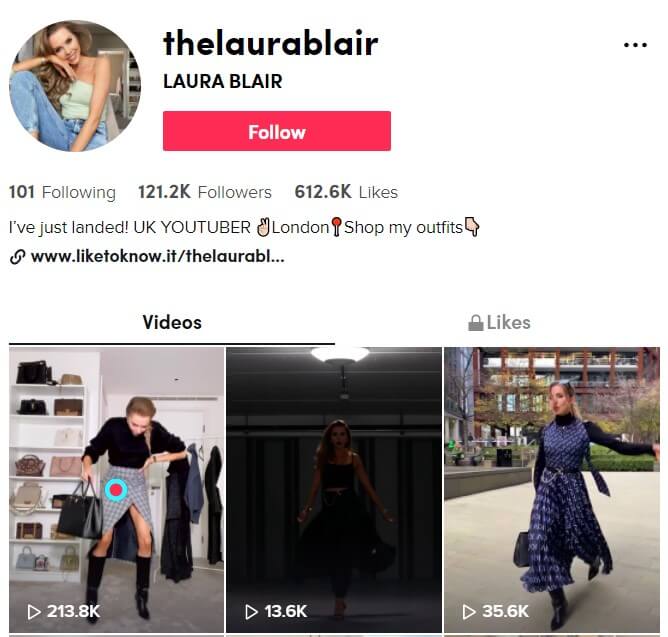
@thelaurablair
Now that we’ve explored the influence of fashion and stuff you would need for a kickass ootd tiktok video, let’s move on to find out how you can make an ootd Tiktok video on mac. Keep reading the following steps:
• Do some rehearsal: Select your outfit of the day, match it with some statement jewelry Now that you’ve done the essentials, and Pick a song that you’d like to use on TikTok.
• Utilizing your tripod + phone camera, record the first dress you’re wearing. Complete it by jumping straight when you choose to switch to the next costume.
Tips It’s essential to play the song when you record this video, So you’ll know precisely when and how to lip-sync or move-sync the music for a great TikTok.
• Switch to your next apparel and continue the video with a hop or a hair flip.
• If you’ve finished shooting with all the outfits, open the Filmora X on your Mac.
• Click “New Project” on FilmoraX to build a new project. Tap the “Import” button to find and add your Tiktok video to the media.

• Afterward, drag-n-drop the imported files to the timeline, Now you can rotate or crop video, modify brightness, contrast, distortion, saturation slow or speed replay speed, set sound pitch, sound, fade in/out, and much more.
• You can drag and drop the imported music to the music track, which will allow the music to play along with your TikTok video. You may also add texts or subtitles to explain the action, or just find out something important.
• In addition to music and text, Filmora X Video Editor also provides a collection of different transformations, effects that connect two clips. You can also apply some interesting effects to your Tiktok video if desired, such as Picture Mask, Shape Mask, Mosaic, and Face-off. Or adjust the speed of playback to render a fast forward or slow-motion clip.
• Once you’re done, tap “Export” to save your video in various formats in your gallery.
• Go to TikTok to post your video!

How to Up Your OOTD Game
It’s challenging to know precisely how to create perfect fashionable content when you first land at TikTok. Save any of the fashionable street fashion or fashion hashtags you’ll find, you definitely will achieve consistency! Extremely fortunate for you, we’ve picked up a whole bunch of Ootd fashion tricks that will keep your followers amused.
Styling a Unique Outfit
Among the most famous TikTok ootd videos from fashionistas is to take a piece of clothing from your wardrobe and then demonstrate a variety of ways to wear it. Selecting something like a sweatshirt or harem pants that a majority of folks are highly probable to find in their closets will help you hit a broader engagement.
Impersonate a Celebrity Look
It’s no surprise that celebrity outfits are always way beyond the price spectrum of most individuals. This sort of TikTok ootd videos are a perfect way to make these expensive outfits affordable to your fans. Choose celebrities with a look close to yours so that you can conveniently use the pieces in your wardrobe.
Style a Theme Inspired Look
Choose a theme, like the 90s fashion for your ootd look. Not only is it a nice way to glance at your clothing differently, and it’s also a perfect way to interact with audiences looking to try fresh clothing trends.
Conclusion
We hope you’ve found this article helpful!! The social media world is already filled with all sorts of Outfit of the day videos. Now that you’ve learned how to make a creative Ootd Tiktok video on Mac by editing it from Filmora X, you can hop to try Filmora X. It’s better to learn how to edit movies on Filmora X by testing it out on your own. The free trial is the perfect way to know how to use Filmora X, so look forward to trying it.


Shanoon Cox
Shanoon Cox is a writer and a lover of all things video.
Follow @Shanoon Cox
Shanoon Cox
Oct 26, 2023• Proven solutions
Do you ever wonder how to make a cool OOTD Tiktok video on Mac? Don’t worry, This article has you covered!! OOTD Styling is at the core of tens of thousands of joyful TikTok video clips. Hugely common with apps like TikTok, such forms of transformation videos are content creator strength.
Once upon a time, anyone asking for fashion tips will have to brace for a weekly magazine to come in the mailbox. Now, due to the rise of social media, open clothing content is almost immediately available, and—then here’s the very cool thing—you can be a part of making it too.
Living entirely in video form, TikTok gives you the ability to display your individuality and the ways clothing shifts toward a picture frozen in time. Plus, the app’s uniqueness is how you don’t need to personalize highly edited, great video. Each TikTok generated is genuine and endearing to viewers, a significant feature for anyone searching for interactive guidance to their style game.
How do TikTokers make an OOTD TikTok video on Mac and edit their videos? Let’s find out in this article.
What You Probably Need
The following aspects are key to making an excellent OOTD video for Tiktok on Mac:
• Great lighting (it is best to do so from a window!)
• A tripod
• 5-10 outfits
• Modifications of Outfit
• A ring light maybe
• Your camera phone
• Free software for editing videos like Filmora X
Who You Can Follow for Reference
Tiktok is a host to some outstanding fashionistas, Here is a couple to track to keep up to date with the newest trends and OOTD TikTokers:
@leoniehanne
@timdessaint
@imdanielsimmons
@estare
@thelaurablair
Now that we’ve explored the influence of fashion and stuff you would need for a kickass ootd tiktok video, let’s move on to find out how you can make an ootd Tiktok video on mac. Keep reading the following steps:
• Do some rehearsal: Select your outfit of the day, match it with some statement jewelry Now that you’ve done the essentials, and Pick a song that you’d like to use on TikTok.
• Utilizing your tripod + phone camera, record the first dress you’re wearing. Complete it by jumping straight when you choose to switch to the next costume.
Tips It’s essential to play the song when you record this video, So you’ll know precisely when and how to lip-sync or move-sync the music for a great TikTok.
• Switch to your next apparel and continue the video with a hop or a hair flip.
• If you’ve finished shooting with all the outfits, open the Filmora X on your Mac.
• Click “New Project” on FilmoraX to build a new project. Tap the “Import” button to find and add your Tiktok video to the media.
• Afterward, drag-n-drop the imported files to the timeline, Now you can rotate or crop video, modify brightness, contrast, distortion, saturation slow or speed replay speed, set sound pitch, sound, fade in/out, and much more.
• You can drag and drop the imported music to the music track, which will allow the music to play along with your TikTok video. You may also add texts or subtitles to explain the action, or just find out something important.
• In addition to music and text, Filmora X Video Editor also provides a collection of different transformations, effects that connect two clips. You can also apply some interesting effects to your Tiktok video if desired, such as Picture Mask, Shape Mask, Mosaic, and Face-off. Or adjust the speed of playback to render a fast forward or slow-motion clip.
• Once you’re done, tap “Export” to save your video in various formats in your gallery.
• Go to TikTok to post your video!
How to Up Your OOTD Game
It’s challenging to know precisely how to create perfect fashionable content when you first land at TikTok. Save any of the fashionable street fashion or fashion hashtags you’ll find, you definitely will achieve consistency! Extremely fortunate for you, we’ve picked up a whole bunch of Ootd fashion tricks that will keep your followers amused.
Styling a Unique Outfit
Among the most famous TikTok ootd videos from fashionistas is to take a piece of clothing from your wardrobe and then demonstrate a variety of ways to wear it. Selecting something like a sweatshirt or harem pants that a majority of folks are highly probable to find in their closets will help you hit a broader engagement.
Impersonate a Celebrity Look
It’s no surprise that celebrity outfits are always way beyond the price spectrum of most individuals. This sort of TikTok ootd videos are a perfect way to make these expensive outfits affordable to your fans. Choose celebrities with a look close to yours so that you can conveniently use the pieces in your wardrobe.
Style a Theme Inspired Look
Choose a theme, like the 90s fashion for your ootd look. Not only is it a nice way to glance at your clothing differently, and it’s also a perfect way to interact with audiences looking to try fresh clothing trends.
Conclusion
We hope you’ve found this article helpful!! The social media world is already filled with all sorts of Outfit of the day videos. Now that you’ve learned how to make a creative Ootd Tiktok video on Mac by editing it from Filmora X, you can hop to try Filmora X. It’s better to learn how to edit movies on Filmora X by testing it out on your own. The free trial is the perfect way to know how to use Filmora X, so look forward to trying it.
Shanoon Cox
Shanoon Cox is a writer and a lover of all things video.
Follow @Shanoon Cox
How to Exclude Unwanted Sounds in Your Recordings Using Audacity
The most frequent request you’ll get from video makers is to eliminate irritating noises like rumbling or humming from an original clip. Almost all of the time, capturing high-quality audio during filming is challenging since the conversation is often hard to hear or is made unclear due to surrounding noises, such as the dreadful air conditioners or fans.
To get rid of all these awful noises, this Audacity Noise Reduction feature will serve you a significant purpose in removing unwanted background noise for your future videos. Without further ado, let’s get started!
In this article
01 Things You Need to Prepare for Background Noise Reduction
02 How to Remove Background Noise in Audacity?
03 Why is Audacity Noise Reduction Not Working?
04 How to Prevent Background Noise in Audio Recording?
05 How to Remove Background Noise in Filmora?
Part 1: Things You Need to Prepare for Background Noise Reduction
Here are few things that you need to consider before you apply the noise reduction to your clips:
1. Noise Sample
A decent sample of the noise you wish to eliminate is perhaps the most crucial aspect of the Audacity remove noise procedure.
This will be used by Audacity to understand the noise and build a noise profile. The noise recording should last for a fair amount of time and be devoid of any other noises.
2. Avoid Copy Pasting Tiny Noise Section in Your Spoken Phrases
When you have a tiny part of noise between your stated words on your audio, please don’t copy/paste it to make a more significant piece of sound for Audacity to examine.
You would not be supplying Audacity with any more information that will help it generate a decent noise profile. The noise profile is what enables Audacity to tell the difference between speech and noise.
3. Minimum 2048 Data Samples Required
To build a noise profile, the Noise Reduction function requires a minimum of 2048 sample data. An audio file with a sampling frequency of 44.1kHz is roughly five hundredths of a second.
Note that this is the minor sound level that Audacity needs to generate a noise profile; however, should you supply a larger sample of the noise, Audacity can typically perform a great job of producing a suitable noise profile. As a result, attempt to capture a few seconds of background noises wherever possible.
4. Establish Recording Level and Record “Silence”
Setting your audio volume and capturing some “quiet” prior to speaking is the best way to achieve this. Instead, when you’ve finished talking, keep your camera/recorder going for a few moments.
Don’t move or create any sounds while capturing the background noises, and keep an ear open for any other noises. You only need to capture the ambient noise for a few moments; two to five seconds will suffice.
Part 2: How to Remove Background Noise in Audacity on Windows and Mac?
Whether you are using Windows or macOS, we will show you a step-by-step process to achieve your results using both software in this part of Audacity remove background music guide.
Remove background noise in Audacity on Windows
Step 1: On your recording, select a few moments of sound. Any segment of noise that incorporates other noises should be avoided.

Step 2: From the Effect menu, select Noise Reduction.

Step 3: Select the Get Noise Profile option whenever the Noise Reduction effect screen appears.

Note: Choose whether to implement the noise removal to the entire waveforms or only a portion of it.
Step 4: To access the Noise Reduction effects window, go to Effects > Noise Reduction. Raise the level of noise reduction progressively while previewing the result.

Step 5: Head over to the File section to Export and Save the result. Audacity does not save sound clips when you select Save Project; instead, you must choose Export. Select the file type you want to store and the place wherever you can save it. Select Save after giving the File Name.

Remove background noise in Audacity on Mac
Step 1: Create a room tone-containing audio file. When you don’t have a separate track for room tone, use a recording with a few moments of quiet in it. Click-and-drag to select a segment with a few minutes of silence using the Selection Tool.

Step 2: Select Noise Reduction from the Effects tab. Select the Get Noise Profile tab in the new tab under Step 1. The screen will shut, and Audacity will take noise profile samples of the indicated area.

Step 3: Click-and-drag to select the whole file, which requires noise reduction with the Selection Tool. To re-open the function, go to the Effect tab and pick Noise Reduction. Make modifications to the following parameters under Step 2:
- Reduce and Residue
- Frequency Smoothing (bands)
- Sensitivity
- Noise Reduction

Step 4: To listen to how the chosen file will look with the selected parameters, select Preview. Re-adjust until you have a sound noise reduction with no interference. When you’re finished, select Reduce and click OK.
Part 3: Why is Audacity Noise Reduction Not Working?
It’s possible that the Noise Reduction function isn’t letting you mop up your recording since your audio isn’t appropriate for it. The disturbance must be continuous, not random or fluctuating, to work for Audacity’s Noise Reduction function.
For example, the Noise Reduction function will not assist if your audio was made in a busy environment with unique noises such as background chatter, random traffic noises, or in an exhibition space or museum. The Noise Reduction feature in Audacity isn’t meant to cope with that kind of distortion. You’ll need to alter your recording approach if you’re capturing voice in either of those situations.
Under the following situations, the Audacity Noise Reduction function might underperform.
- Particular noise in the background, including traffic or people.
- When the harmonics of the sound and voice are comparable.
- There is sound variance where there is fluctuation in the noise.
- The volume of the voice is comparable to or lower than that of the background noise.
- When the noise is irregular or changeable rather than continuous.
- The loudness is deafening.
- The sound is a single click or pop.
Part 4: How to Prevent Background Noise in Audio Recording?
Although Audacity allows eliminating noise very simply, it is still an additional level that takes time to refine your podcast production. These pointers can help you avoid the necessity for noise reduction and cut down on the amount of time you spend processing.
1. Reduce the Computer Fan Noise
Whenever computers become too heated, they can produce a lot of noise. You may limit the amount of software that runs and position your mic away from the keyboard to help lessen this impact and avoid the fan from coming on.
However, even if you observe all of these guidelines, undesired recording sounds may still appear in your program. Fortunately, contemporary software makes this problem quite simple to resolve.
2. Reduce the Gain and Get Close to the Mic
Reduce the gain (sensitivity of the microphone) and go nearer to it. Talking straight into the microphone won’t distort your audio if you reduce the gain, and that would assist your microphone in concentrating on scooping up your voice’s tone.
Bonus Tip: Set your recorder’s (or DAW’s) sensitivity such that your speech peaks between -12 and -10db.
3. Utilize a Versatile Microphone
Condenser and dynamic microphones are the two most common types of podcast microphones. Condenser microphones are significantly more sensitive instruments meant to take up average atmospheric noise, whereas dynamic microphones have a narrower frequency range, picking up fewer ambient noises.
4. Optimize Your Recording Environment
The most significant and most crucial aspect of your podcasts’ sound quality is where you capture it. To optimize your personal podcasting space, we recommend choosing a peaceful, compact area away from HVAC systems, vehicles, external hard drives, background sound, motors, and other distractions. You may also increase the tone of your room by using natural sound absorbents such as curtains, rugs, carpets, and sofas.
Part 5: How to Remove Background Noise in Filmora?
Although there is a lot of software available to eliminate ambient noise, we highly suggest Wondershare Filmora Video Editor to edit audio and video in one place.
In addition to the standard audio editing capabilities, the recently redesigned Filmora currently includes enhanced waveforms, volume Keyframing , peak metering, and audio transitions, giving you a better audio editing interface.
For Win 7 or later (64-bit)
For macOS 10.12 or later
Filmora Video Editor will quickly remove ambient sound from both sound/video. You may also remove the sound from the video with this simple video editor, use the Audio Equalizer or Audio Mixer functions to modify the audio further, and then Export and save the audio in an Mp3 file. Here are the detailed steps:
Step 1: In the Wondershare Filmora Timeline menu, Import your footage. Trim the footage after previewing it and deleting the sections you don’t want to retain.

Step 2: To eliminate the ambient noise immediately, double-click on the video file, and go to the Audio panel to select the Remove Background Noise option. You will find that the background noise is removed automatically.

Step 3: After checking the results, select Export to download the noise-reduced clip to your desktop or upload it immediately to YouTube or Vimeo.

Conclusion
Well, there you have it. In this Audacity Remove Background Noise guide, we have reviewed every possible method you can adopt to get rid of the unnecessary background noise in the Audacity. And if the desired results are still not achieved, we highly recommend using the Wondershare Filmora editing software. Not only will it help you remove the unwanted ambient noise, but it will also allow you to customize your audio or video file further.
02 How to Remove Background Noise in Audacity?
03 Why is Audacity Noise Reduction Not Working?
04 How to Prevent Background Noise in Audio Recording?
05 How to Remove Background Noise in Filmora?
Part 1: Things You Need to Prepare for Background Noise Reduction
Here are few things that you need to consider before you apply the noise reduction to your clips:
1. Noise Sample
A decent sample of the noise you wish to eliminate is perhaps the most crucial aspect of the Audacity remove noise procedure.
This will be used by Audacity to understand the noise and build a noise profile. The noise recording should last for a fair amount of time and be devoid of any other noises.
2. Avoid Copy Pasting Tiny Noise Section in Your Spoken Phrases
When you have a tiny part of noise between your stated words on your audio, please don’t copy/paste it to make a more significant piece of sound for Audacity to examine.
You would not be supplying Audacity with any more information that will help it generate a decent noise profile. The noise profile is what enables Audacity to tell the difference between speech and noise.
3. Minimum 2048 Data Samples Required
To build a noise profile, the Noise Reduction function requires a minimum of 2048 sample data. An audio file with a sampling frequency of 44.1kHz is roughly five hundredths of a second.
Note that this is the minor sound level that Audacity needs to generate a noise profile; however, should you supply a larger sample of the noise, Audacity can typically perform a great job of producing a suitable noise profile. As a result, attempt to capture a few seconds of background noises wherever possible.
4. Establish Recording Level and Record “Silence”
Setting your audio volume and capturing some “quiet” prior to speaking is the best way to achieve this. Instead, when you’ve finished talking, keep your camera/recorder going for a few moments.
Don’t move or create any sounds while capturing the background noises, and keep an ear open for any other noises. You only need to capture the ambient noise for a few moments; two to five seconds will suffice.
Part 2: How to Remove Background Noise in Audacity on Windows and Mac?
Whether you are using Windows or macOS, we will show you a step-by-step process to achieve your results using both software in this part of Audacity remove background music guide.
Remove background noise in Audacity on Windows
Step 1: On your recording, select a few moments of sound. Any segment of noise that incorporates other noises should be avoided.
Step 2: From the Effect menu, select Noise Reduction.
Step 3: Select the Get Noise Profile option whenever the Noise Reduction effect screen appears.
Note: Choose whether to implement the noise removal to the entire waveforms or only a portion of it.
Step 4: To access the Noise Reduction effects window, go to Effects > Noise Reduction. Raise the level of noise reduction progressively while previewing the result.
Step 5: Head over to the File section to Export and Save the result. Audacity does not save sound clips when you select Save Project; instead, you must choose Export. Select the file type you want to store and the place wherever you can save it. Select Save after giving the File Name.
Remove background noise in Audacity on Mac
Step 1: Create a room tone-containing audio file. When you don’t have a separate track for room tone, use a recording with a few moments of quiet in it. Click-and-drag to select a segment with a few minutes of silence using the Selection Tool.
Step 2: Select Noise Reduction from the Effects tab. Select the Get Noise Profile tab in the new tab under Step 1. The screen will shut, and Audacity will take noise profile samples of the indicated area.
Step 3: Click-and-drag to select the whole file, which requires noise reduction with the Selection Tool. To re-open the function, go to the Effect tab and pick Noise Reduction. Make modifications to the following parameters under Step 2:
- Reduce and Residue
- Frequency Smoothing (bands)
- Sensitivity
- Noise Reduction
Step 4: To listen to how the chosen file will look with the selected parameters, select Preview. Re-adjust until you have a sound noise reduction with no interference. When you’re finished, select Reduce and click OK.
Part 3: Why is Audacity Noise Reduction Not Working?
It’s possible that the Noise Reduction function isn’t letting you mop up your recording since your audio isn’t appropriate for it. The disturbance must be continuous, not random or fluctuating, to work for Audacity’s Noise Reduction function.
For example, the Noise Reduction function will not assist if your audio was made in a busy environment with unique noises such as background chatter, random traffic noises, or in an exhibition space or museum. The Noise Reduction feature in Audacity isn’t meant to cope with that kind of distortion. You’ll need to alter your recording approach if you’re capturing voice in either of those situations.
Under the following situations, the Audacity Noise Reduction function might underperform.
- Particular noise in the background, including traffic or people.
- When the harmonics of the sound and voice are comparable.
- There is sound variance where there is fluctuation in the noise.
- The volume of the voice is comparable to or lower than that of the background noise.
- When the noise is irregular or changeable rather than continuous.
- The loudness is deafening.
- The sound is a single click or pop.
Part 4: How to Prevent Background Noise in Audio Recording?
Although Audacity allows eliminating noise very simply, it is still an additional level that takes time to refine your podcast production. These pointers can help you avoid the necessity for noise reduction and cut down on the amount of time you spend processing.
1. Reduce the Computer Fan Noise
Whenever computers become too heated, they can produce a lot of noise. You may limit the amount of software that runs and position your mic away from the keyboard to help lessen this impact and avoid the fan from coming on.
However, even if you observe all of these guidelines, undesired recording sounds may still appear in your program. Fortunately, contemporary software makes this problem quite simple to resolve.
2. Reduce the Gain and Get Close to the Mic
Reduce the gain (sensitivity of the microphone) and go nearer to it. Talking straight into the microphone won’t distort your audio if you reduce the gain, and that would assist your microphone in concentrating on scooping up your voice’s tone.
Bonus Tip: Set your recorder’s (or DAW’s) sensitivity such that your speech peaks between -12 and -10db.
3. Utilize a Versatile Microphone
Condenser and dynamic microphones are the two most common types of podcast microphones. Condenser microphones are significantly more sensitive instruments meant to take up average atmospheric noise, whereas dynamic microphones have a narrower frequency range, picking up fewer ambient noises.
4. Optimize Your Recording Environment
The most significant and most crucial aspect of your podcasts’ sound quality is where you capture it. To optimize your personal podcasting space, we recommend choosing a peaceful, compact area away from HVAC systems, vehicles, external hard drives, background sound, motors, and other distractions. You may also increase the tone of your room by using natural sound absorbents such as curtains, rugs, carpets, and sofas.
Part 5: How to Remove Background Noise in Filmora?
Although there is a lot of software available to eliminate ambient noise, we highly suggest Wondershare Filmora Video Editor to edit audio and video in one place.
In addition to the standard audio editing capabilities, the recently redesigned Filmora currently includes enhanced waveforms, volume Keyframing , peak metering, and audio transitions, giving you a better audio editing interface.
For Win 7 or later (64-bit)
For macOS 10.12 or later
Filmora Video Editor will quickly remove ambient sound from both sound/video. You may also remove the sound from the video with this simple video editor, use the Audio Equalizer or Audio Mixer functions to modify the audio further, and then Export and save the audio in an Mp3 file. Here are the detailed steps:
Step 1: In the Wondershare Filmora Timeline menu, Import your footage. Trim the footage after previewing it and deleting the sections you don’t want to retain.
Step 2: To eliminate the ambient noise immediately, double-click on the video file, and go to the Audio panel to select the Remove Background Noise option. You will find that the background noise is removed automatically.
Step 3: After checking the results, select Export to download the noise-reduced clip to your desktop or upload it immediately to YouTube or Vimeo.
Conclusion
Well, there you have it. In this Audacity Remove Background Noise guide, we have reviewed every possible method you can adopt to get rid of the unnecessary background noise in the Audacity. And if the desired results are still not achieved, we highly recommend using the Wondershare Filmora editing software. Not only will it help you remove the unwanted ambient noise, but it will also allow you to customize your audio or video file further.
Also read:
- [New] In 2024, Master the Art of Storytelling in TikTok with These Quotes
- 2024 Approved Eliminate Watermarks Expert TikTok-MP4 Converter
- [Updated] 2024 Approved Step-by-Step Guide to Attending Live Showcases on TikTok
- [Updated] 2024 Approved The Top Ten Ways to Propel Your TikTok Campaigns Forward
- [New] In 2024, Unmissable TikTok Gifts on Amazon Top 30 Findings
- [Updated] Move to the Beat The Essential Guide to Mac-Based TikTok Dances for 2024
- 2024 Approved The Dos and Don'ts of Creating an Authentic TikTok Version of Ourselves
- 2024 Approved Instant Tune Livestreams on Douyin
- 2024 Approved Revolutionize Your TikTok Experience - 50+ Impressive Name Ideas
- [New] Accelerating Your TikTok Content A Quick Guide for 2024
- [New] The Role and Relevance of PFP in TikTok Culture for 2024
- [Updated] 2024 Approved How to Edit Video for TikTok on Mac
- In 2024, Your Complete MacOOTD Filmmaking Handbook
- [New] Unlocking the Mystery of 'PFP' A TikTok Perspective for 2024
- [Updated] 2024 Approved Vocalizing Your Visual Content A Complete TikTok Manual
- [Updated] In 2024, TikTok Teases, Amazon Offers The Ultimate Deals to Know Now
- Quickly Convert to GIF Best Practices for TikTok Video Artistry for 2024
- [Updated] In 2024, Maximize Impact with TikTok Videos From Your Personal Computer or MAC
- [New] Dominate the Digital Landscape Commerce via TikTok for 2024
- [Updated] In 2024, Edible Heritage Time-Honored Dishes From Abroad
- Navigating the World of Phone-Based Video Recording
- [Updated] In 2024, Explore Novel TikTok Profile Features to Elevate Your Status
- [Updated] In 2024, Challenges Vs. Viral Hits Can LikeBeat TikTok's Growth?
- [Updated] 2024 Approved Mastering the Craft of Viral Social Media Marketing on TikTok
- [Updated] Screwball Skirmishes Uncovering the Funniest TikTok Game Battles
- [New] 2024 Approved Mastering TikTok Identity Ultimate Profile Transformation Guide
- [Updated] In 2024, Jujutsu Kaisen in Action Making Memorable TikTok Videos
- Noticing Lack of Friend Requests
- 2024 Approved 77 Hilarious TikTok Quiz Time
- [New] 2024 Approved Command Attention with These Powerful 20 TikTok Caption Ideas
- [Updated] In 2024, Decoding TikTok's Favorites - Explore #7 Best Emojis & Secrets
- Exploring the Significance of PFP on TikTok Platform
- TikTok Text Mastery Identify These Five Pioneering Font Generators for 2024
- [Updated] The Insider's Guide to TikTok on Apple and Windows Systems for 2024
- [Updated] In 2024, Top Non-TikTok Apps Keep Up with Trending Social Media
- [Updated] 2024 Approved Enthralling Entertainers Top 15 Influencers From TikTok Talents
- [Updated] In 2024, Transform Your TikTok Experience From Basic Recording to Professional Filming
- [Updated] In 2024, Strategic Hashtag Usage for Enhanced Visibility on TikTok
- In 2024, 20 Favorite TikTok Dances Fun & Simplicity Combined
- [Updated] In 2024, Quick Guide to Faster TikTok Creation
- [Updated] Uninterrupted Song Livestreaming on HuyaTV for 2024
- In 2024, Captivating Audiences Effective TikTok Promotions and Advertising
- [Updated] 50 Clever TikTok Gags for Laughter for 2024
- 2024 Approved The Ultimate Guide to Social Media Success Popular & Secret TikTok Emojis
- How to Transfer Photos from Nubia Z50 Ultra to Laptop Without USB | Dr.fone
- [New] How to Create Stunning IGTV Video Footage Using Smartphones and DSLR
- Updated 2024 Approved Advanced Methods for Silencing Background Music in Videos
- Voice Clarity Revolution An Overview of Noise Reduction Strategies in Audio Editing Web Portals
- In 2024, How To Unlock iPhone 12 Pro 3 Ways To Unlock
- [Updated] 2024 Approved No-Limit Record Media Software
- Pro-Rated Apple Compreran of the Best Screen Recorders
- How to Fix It Samsung Galaxy F54 5G Wont Turn On | Dr.fone
- In 2024, Tutorial to Change OnePlus Nord CE 3 5G IMEI without Root A Comprehensive Guide
- 2024 Approved Reviving Your Visual Story Adding Instagram's Flavor to Old Photos/Videos
- Here are Some Pro Tips for Pokemon Go PvP Battles On Realme V30T | Dr.fone
- [Updated] In 2024, Detailed Explanation for Transforming Gender Display in Instagram, Facebook & Snapchat Pictures
- How To Fake GPS On Xiaomi Redmi Note 12R For Mobile Legends? | Dr.fone
- [Updated] Top 10 Best Screen Recorders for PC and Mac for 2024
- In 2024, Hacks to do pokemon go trainer battles For Vivo S17 Pro | Dr.fone
- [Updated] In 2024, Enhance Your Content Creating Engaging Loop Videos for IG
- [New] In 2024, VisualLoger 12 Professional
- [New] Sidestep Social Snubs 10 Proven Steps for Fb Freedom
- In 2024, How to jailbreak iCloud locked Apple iPhone 13
- Updated In 2024, Maximize Acoustic Performance via Interactive Ducking Dynamics
- Quick Guide Best Free Instagram-to-MP4 Tools (Windows/Mac)
- 2024 Approved FCP X Pro Tutorials Creating Realistic Green Screen Effects
- 4 Ways to Transfer Music from Apple iPhone 11 Pro Max to iPod touch | Dr.fone
- Fix App Not Available in Your Country Play Store Problem on Poco C51 | Dr.fone
- [New] Bridging Twitter and FB with Shared Vids for 2024
- [New] In 2024, How to Download OBS Studio for Mac
- [New] 2024 Approved Transform Your Device's Display Into a High-Quality Record
- 11 Ways to Fix it When My Nokia C110 Wont Charge | Dr.fone
- [New] In 2024, Navigating the Nuances of PPT Voiceover Performance
- 2024 Approved How to Export Audacity to Mp3
- Updated The Ultimate Aspect Ratio Calculator for Images
- [Updated] 2024 Approved ShareX's Competitors Unveiled
- How to share/fake gps on Uber for Infinix Zero 5G 2023 Turbo | Dr.fone
- [Updated] In 2024, Secure Your Device Footage with Mi 11 Techniques
- Fixed Excel 2007 Found a Problem with One or more Formula | Stellar
- In 2024, Android Unlock Code Sim Unlock Your Vivo Y100i Phone and Remove Locked Screen
- 2024 Approved 15 Best LUTS to Buy
- Title: "[New] 2024 Approved Bridging Fashion & Filmmaking OOTD Tips for Mac Users"
- Author: Gary
- Created at : 2024-05-23 07:13:37
- Updated at : 2024-05-24 07:13:37
- Link: https://tiktok-clips.techidaily.com/new-2024-approved-bridging-fashion-and-filmmaking-ootd-tips-for-mac-users/
- License: This work is licensed under CC BY-NC-SA 4.0.
