
!["[New] 2024 Approved Banishing Auditory Distractions A Guide on Audacity's Noise Reduction"](https://www.lifewire.com/thmb/INF6SYasZPz8DbBoNXqU2flP540=/400x300/filters:no_upscale():max_bytes(150000):strip_icc():format(webp)/before-you-buy-a-video-projector-1847845-v3-ED-8a08e03f2cfc4835a13872618bd4ad00.png)
"[New] 2024 Approved Banishing Auditory Distractions A Guide on Audacity's Noise Reduction"
Banishing Auditory Distractions: A Guide on Audacity’s Noise Reduction
The most frequent request you’ll get from video makers is to eliminate irritating noises like rumbling or humming from an original clip. Almost all of the time, capturing high-quality audio during filming is challenging since the conversation is often hard to hear or is made unclear due to surrounding noises, such as the dreadful air conditioners or fans.
To get rid of all these awful noises, this Audacity Noise Reduction feature will serve you a significant purpose in removing unwanted background noise for your future videos. Without further ado, let’s get started!
In this article
01 Things You Need to Prepare for Background Noise Reduction
02 How to Remove Background Noise in Audacity?
03 Why is Audacity Noise Reduction Not Working?
04 How to Prevent Background Noise in Audio Recording?
05 How to Remove Background Noise in Filmora?
Part 1: Things You Need to Prepare for Background Noise Reduction
Here are few things that you need to consider before you apply the noise reduction to your clips:
1. Noise Sample
A decent sample of the noise you wish to eliminate is perhaps the most crucial aspect of the Audacity remove noise procedure.
This will be used by Audacity to understand the noise and build a noise profile. The noise recording should last for a fair amount of time and be devoid of any other noises.
2. Avoid Copy Pasting Tiny Noise Section in Your Spoken Phrases
When you have a tiny part of noise between your stated words on your audio, please don’t copy/paste it to make a more significant piece of sound for Audacity to examine.
You would not be supplying Audacity with any more information that will help it generate a decent noise profile. The noise profile is what enables Audacity to tell the difference between speech and noise.
3. Minimum 2048 Data Samples Required
To build a noise profile, the Noise Reduction function requires a minimum of 2048 sample data. An audio file with a sampling frequency of 44.1kHz is roughly five hundredths of a second.
Note that this is the minor sound level that Audacity needs to generate a noise profile; however, should you supply a larger sample of the noise, Audacity can typically perform a great job of producing a suitable noise profile. As a result, attempt to capture a few seconds of background noises wherever possible.
4. Establish Recording Level and Record “Silence”
Setting your audio volume and capturing some “quiet” prior to speaking is the best way to achieve this. Instead, when you’ve finished talking, keep your camera/recorder going for a few moments.
Don’t move or create any sounds while capturing the background noises, and keep an ear open for any other noises. You only need to capture the ambient noise for a few moments; two to five seconds will suffice.
Part 2: How to Remove Background Noise in Audacity on Windows and Mac?
Whether you are using Windows or macOS, we will show you a step-by-step process to achieve your results using both software in this part of Audacity remove background music guide.
Remove background noise in Audacity on Windows
Step 1: On your recording, select a few moments of sound. Any segment of noise that incorporates other noises should be avoided.

Step 2: From the Effect menu, select Noise Reduction.

Step 3: Select the Get Noise Profile option whenever the Noise Reduction effect screen appears.

Note: Choose whether to implement the noise removal to the entire waveforms or only a portion of it.
Step 4: To access the Noise Reduction effects window, go to Effects > Noise Reduction. Raise the level of noise reduction progressively while previewing the result.

Step 5: Head over to the File section to Export and Save the result. Audacity does not save sound clips when you select Save Project; instead, you must choose Export. Select the file type you want to store and the place wherever you can save it. Select Save after giving the File Name.

Remove background noise in Audacity on Mac
Step 1: Create a room tone-containing audio file. When you don’t have a separate track for room tone, use a recording with a few moments of quiet in it. Click-and-drag to select a segment with a few minutes of silence using the Selection Tool.

Step 2: Select Noise Reduction from the Effects tab. Select the Get Noise Profile tab in the new tab under Step 1. The screen will shut, and Audacity will take noise profile samples of the indicated area.

Step 3: Click-and-drag to select the whole file, which requires noise reduction with the Selection Tool. To re-open the function, go to the Effect tab and pick Noise Reduction. Make modifications to the following parameters under Step 2:
- Reduce and Residue
- Frequency Smoothing (bands)
- Sensitivity
- Noise Reduction

Step 4: To listen to how the chosen file will look with the selected parameters, select Preview. Re-adjust until you have a sound noise reduction with no interference. When you’re finished, select Reduce and click OK.
Part 3: Why is Audacity Noise Reduction Not Working?
It’s possible that the Noise Reduction function isn’t letting you mop up your recording since your audio isn’t appropriate for it. The disturbance must be continuous, not random or fluctuating, to work for Audacity’s Noise Reduction function.
For example, the Noise Reduction function will not assist if your audio was made in a busy environment with unique noises such as background chatter, random traffic noises, or in an exhibition space or museum. The Noise Reduction feature in Audacity isn’t meant to cope with that kind of distortion. You’ll need to alter your recording approach if you’re capturing voice in either of those situations.
Under the following situations, the Audacity Noise Reduction function might underperform.
- Particular noise in the background, including traffic or people.
- When the harmonics of the sound and voice are comparable.
- There is sound variance where there is fluctuation in the noise.
- The volume of the voice is comparable to or lower than that of the background noise.
- When the noise is irregular or changeable rather than continuous.
- The loudness is deafening.
- The sound is a single click or pop.
Part 4: How to Prevent Background Noise in Audio Recording?
Although Audacity allows eliminating noise very simply, it is still an additional level that takes time to refine your podcast production. These pointers can help you avoid the necessity for noise reduction and cut down on the amount of time you spend processing.
1. Reduce the Computer Fan Noise
Whenever computers become too heated, they can produce a lot of noise. You may limit the amount of software that runs and position your mic away from the keyboard to help lessen this impact and avoid the fan from coming on.
However, even if you observe all of these guidelines, undesired recording sounds may still appear in your program. Fortunately, contemporary software makes this problem quite simple to resolve.
2. Reduce the Gain and Get Close to the Mic
Reduce the gain (sensitivity of the microphone) and go nearer to it. Talking straight into the microphone won’t distort your audio if you reduce the gain, and that would assist your microphone in concentrating on scooping up your voice’s tone.
Bonus Tip: Set your recorder’s (or DAW’s) sensitivity such that your speech peaks between -12 and -10db.
3. Utilize a Versatile Microphone
Condenser and dynamic microphones are the two most common types of podcast microphones. Condenser microphones are significantly more sensitive instruments meant to take up average atmospheric noise, whereas dynamic microphones have a narrower frequency range, picking up fewer ambient noises.
4. Optimize Your Recording Environment
The most significant and most crucial aspect of your podcasts’ sound quality is where you capture it. To optimize your personal podcasting space, we recommend choosing a peaceful, compact area away from HVAC systems, vehicles, external hard drives, background sound, motors, and other distractions. You may also increase the tone of your room by using natural sound absorbents such as curtains, rugs, carpets, and sofas.
Part 5: How to Remove Background Noise in Filmora?
Although there is a lot of software available to eliminate ambient noise, we highly suggest Wondershare Filmora Video Editor to edit audio and video in one place.
In addition to the standard audio editing capabilities, the recently redesigned Filmora currently includes enhanced waveforms, volume Keyframing , peak metering, and audio transitions, giving you a better audio editing interface.
For Win 7 or later (64-bit)
For macOS 10.12 or later
Filmora Video Editor will quickly remove ambient sound from both sound/video. You may also remove the sound from the video with this simple video editor, use the Audio Equalizer or Audio Mixer functions to modify the audio further, and then Export and save the audio in an Mp3 file. Here are the detailed steps:
Step 1: In the Wondershare Filmora Timeline menu, Import your footage. Trim the footage after previewing it and deleting the sections you don’t want to retain.

Step 2: To eliminate the ambient noise immediately, double-click on the video file, and go to the Audio panel to select the Remove Background Noise option. You will find that the background noise is removed automatically.

Step 3: After checking the results, select Export to download the noise-reduced clip to your desktop or upload it immediately to YouTube or Vimeo.

Conclusion
Well, there you have it. In this Audacity Remove Background Noise guide, we have reviewed every possible method you can adopt to get rid of the unnecessary background noise in the Audacity. And if the desired results are still not achieved, we highly recommend using the Wondershare Filmora editing software. Not only will it help you remove the unwanted ambient noise, but it will also allow you to customize your audio or video file further.
02 How to Remove Background Noise in Audacity?
03 Why is Audacity Noise Reduction Not Working?
04 How to Prevent Background Noise in Audio Recording?
05 How to Remove Background Noise in Filmora?
Part 1: Things You Need to Prepare for Background Noise Reduction
Here are few things that you need to consider before you apply the noise reduction to your clips:
1. Noise Sample
A decent sample of the noise you wish to eliminate is perhaps the most crucial aspect of the Audacity remove noise procedure.
This will be used by Audacity to understand the noise and build a noise profile. The noise recording should last for a fair amount of time and be devoid of any other noises.
2. Avoid Copy Pasting Tiny Noise Section in Your Spoken Phrases
When you have a tiny part of noise between your stated words on your audio, please don’t copy/paste it to make a more significant piece of sound for Audacity to examine.
You would not be supplying Audacity with any more information that will help it generate a decent noise profile. The noise profile is what enables Audacity to tell the difference between speech and noise.
3. Minimum 2048 Data Samples Required
To build a noise profile, the Noise Reduction function requires a minimum of 2048 sample data. An audio file with a sampling frequency of 44.1kHz is roughly five hundredths of a second.
Note that this is the minor sound level that Audacity needs to generate a noise profile; however, should you supply a larger sample of the noise, Audacity can typically perform a great job of producing a suitable noise profile. As a result, attempt to capture a few seconds of background noises wherever possible.
4. Establish Recording Level and Record “Silence”
Setting your audio volume and capturing some “quiet” prior to speaking is the best way to achieve this. Instead, when you’ve finished talking, keep your camera/recorder going for a few moments.
Don’t move or create any sounds while capturing the background noises, and keep an ear open for any other noises. You only need to capture the ambient noise for a few moments; two to five seconds will suffice.
Part 2: How to Remove Background Noise in Audacity on Windows and Mac?
Whether you are using Windows or macOS, we will show you a step-by-step process to achieve your results using both software in this part of Audacity remove background music guide.
Remove background noise in Audacity on Windows
Step 1: On your recording, select a few moments of sound. Any segment of noise that incorporates other noises should be avoided.
Step 2: From the Effect menu, select Noise Reduction.
Step 3: Select the Get Noise Profile option whenever the Noise Reduction effect screen appears.
Note: Choose whether to implement the noise removal to the entire waveforms or only a portion of it.
Step 4: To access the Noise Reduction effects window, go to Effects > Noise Reduction. Raise the level of noise reduction progressively while previewing the result.
Step 5: Head over to the File section to Export and Save the result. Audacity does not save sound clips when you select Save Project; instead, you must choose Export. Select the file type you want to store and the place wherever you can save it. Select Save after giving the File Name.
Remove background noise in Audacity on Mac
Step 1: Create a room tone-containing audio file. When you don’t have a separate track for room tone, use a recording with a few moments of quiet in it. Click-and-drag to select a segment with a few minutes of silence using the Selection Tool.
Step 2: Select Noise Reduction from the Effects tab. Select the Get Noise Profile tab in the new tab under Step 1. The screen will shut, and Audacity will take noise profile samples of the indicated area.
Step 3: Click-and-drag to select the whole file, which requires noise reduction with the Selection Tool. To re-open the function, go to the Effect tab and pick Noise Reduction. Make modifications to the following parameters under Step 2:
- Reduce and Residue
- Frequency Smoothing (bands)
- Sensitivity
- Noise Reduction
Step 4: To listen to how the chosen file will look with the selected parameters, select Preview. Re-adjust until you have a sound noise reduction with no interference. When you’re finished, select Reduce and click OK.
Part 3: Why is Audacity Noise Reduction Not Working?
It’s possible that the Noise Reduction function isn’t letting you mop up your recording since your audio isn’t appropriate for it. The disturbance must be continuous, not random or fluctuating, to work for Audacity’s Noise Reduction function.
For example, the Noise Reduction function will not assist if your audio was made in a busy environment with unique noises such as background chatter, random traffic noises, or in an exhibition space or museum. The Noise Reduction feature in Audacity isn’t meant to cope with that kind of distortion. You’ll need to alter your recording approach if you’re capturing voice in either of those situations.
Under the following situations, the Audacity Noise Reduction function might underperform.
- Particular noise in the background, including traffic or people.
- When the harmonics of the sound and voice are comparable.
- There is sound variance where there is fluctuation in the noise.
- The volume of the voice is comparable to or lower than that of the background noise.
- When the noise is irregular or changeable rather than continuous.
- The loudness is deafening.
- The sound is a single click or pop.
Part 4: How to Prevent Background Noise in Audio Recording?
Although Audacity allows eliminating noise very simply, it is still an additional level that takes time to refine your podcast production. These pointers can help you avoid the necessity for noise reduction and cut down on the amount of time you spend processing.
1. Reduce the Computer Fan Noise
Whenever computers become too heated, they can produce a lot of noise. You may limit the amount of software that runs and position your mic away from the keyboard to help lessen this impact and avoid the fan from coming on.
However, even if you observe all of these guidelines, undesired recording sounds may still appear in your program. Fortunately, contemporary software makes this problem quite simple to resolve.
2. Reduce the Gain and Get Close to the Mic
Reduce the gain (sensitivity of the microphone) and go nearer to it. Talking straight into the microphone won’t distort your audio if you reduce the gain, and that would assist your microphone in concentrating on scooping up your voice’s tone.
Bonus Tip: Set your recorder’s (or DAW’s) sensitivity such that your speech peaks between -12 and -10db.
3. Utilize a Versatile Microphone
Condenser and dynamic microphones are the two most common types of podcast microphones. Condenser microphones are significantly more sensitive instruments meant to take up average atmospheric noise, whereas dynamic microphones have a narrower frequency range, picking up fewer ambient noises.
4. Optimize Your Recording Environment
The most significant and most crucial aspect of your podcasts’ sound quality is where you capture it. To optimize your personal podcasting space, we recommend choosing a peaceful, compact area away from HVAC systems, vehicles, external hard drives, background sound, motors, and other distractions. You may also increase the tone of your room by using natural sound absorbents such as curtains, rugs, carpets, and sofas.
Part 5: How to Remove Background Noise in Filmora?
Although there is a lot of software available to eliminate ambient noise, we highly suggest Wondershare Filmora Video Editor to edit audio and video in one place.
In addition to the standard audio editing capabilities, the recently redesigned Filmora currently includes enhanced waveforms, volume Keyframing , peak metering, and audio transitions, giving you a better audio editing interface.
For Win 7 or later (64-bit)
For macOS 10.12 or later
Filmora Video Editor will quickly remove ambient sound from both sound/video. You may also remove the sound from the video with this simple video editor, use the Audio Equalizer or Audio Mixer functions to modify the audio further, and then Export and save the audio in an Mp3 file. Here are the detailed steps:
Step 1: In the Wondershare Filmora Timeline menu, Import your footage. Trim the footage after previewing it and deleting the sections you don’t want to retain.
Step 2: To eliminate the ambient noise immediately, double-click on the video file, and go to the Audio panel to select the Remove Background Noise option. You will find that the background noise is removed automatically.
Step 3: After checking the results, select Export to download the noise-reduced clip to your desktop or upload it immediately to YouTube or Vimeo.
Conclusion
Well, there you have it. In this Audacity Remove Background Noise guide, we have reviewed every possible method you can adopt to get rid of the unnecessary background noise in the Audacity. And if the desired results are still not achieved, we highly recommend using the Wondershare Filmora editing software. Not only will it help you remove the unwanted ambient noise, but it will also allow you to customize your audio or video file further.
Mastering the Art of Growth in a Saturated TikTok Market
8 Must-Have TikTok Tools to Boost Your Growth

Shanoon Cox
Mar 27, 2024• Proven solutions
The youth-oriented app called TikTok has already found its place among many users across the globe. It’s not just a lip-syncing platform with lots of followers, likes, and fame. Moreover, it’s a great place for marketing purposes. All of its influencers are using particular TikTok tools to attract handsome sponsorships. It is what the goal and process of making money on TikTok are currently. The need is to use those tools in a channelized manner to boost overall growth on this Chinese app.
After analyzing the growth analytics and behaviors of TikTok influencers, we researched eight must-have TikTok tools for your ultimate success. Without further ado, let’s discuss their versatile features along with price and availability.
Top 8 TikTok Tools for Ultimate Growth
For ease of use and better channelization among each area, we’ve divided these eight tools into three sub-parts, as discussed below.
- Part 1: Best TikTok Tools for Video Editing
- Part 2: Best TikTok Tools for Marketing
- Part 3: Best TikTok Tools to Gain More Following
Best TikTok Tools for Video Editing
In terms of video editing, you must go for two tasks. Apart from the inbuilt video editor of TikTok, we’ll discuss an additional video editor with impeccable qualities.
1. TikTok Built-In Video Editor
Right after video recording on TikTok, you can jump to its interesting inbuilt editing session. It can capably perform basic tasks of adding filters, soundtracks, blurring, and so on. Tapping on + icon will let you present both the recording and editing interface. You can use certain features even while recording video. Tap on Add a sound to go through TikTok’s vast media library.
Features
- There are several options in Beauty, Filters, Timer, Speed, and Flip, etc.
- Turn on the Beauty mode for smoothness and shadow removal.
- Flip is a feature that helps switch the camera mode.
- Playback speed can be changed from 0.1x to 3x i.e., from slow motion to fast motion.
- The next two worth noting features are Trim and Mixer. Tap on Trim to shorten the video length. And Mixer is used to adjusting the playback sound levels.
Pricing: Free
2. Wondershare Filmora Video Editor


Now, let’s check the advanced editing solution by WondershareFilmora. Almost every influencer we checked to use external video editor for making videos that stand out. Furthermore, the upgraded version is loaded with new in-built effects to consider. Whether it’s travel, music, game, business, family, vlog, and education, WondershareFilmora is there to help with advanced yet easy-to-use editing solutions.
Features
- It offers a range of beautiful overlays and filters for exceptional editing.
- They feature a Filmstock with loads of royalty-free audio files, video files, video effects, and stock images, etc. All in all, it’s a handy tool for TikTok video creators.
- If you wish to learn editing and photography skills, simply subscribe to their Video Editing Academy.
- The platform offers 24/7 user-friendly support with helpful tips on growth and other support channels.
Pricing: Perpetual subscription at $69.99.
Best TikTok Tools for Marketing
Marketing is essential, and here are different ways you can advertise your TikTok account.
1. TikTokAnalytics
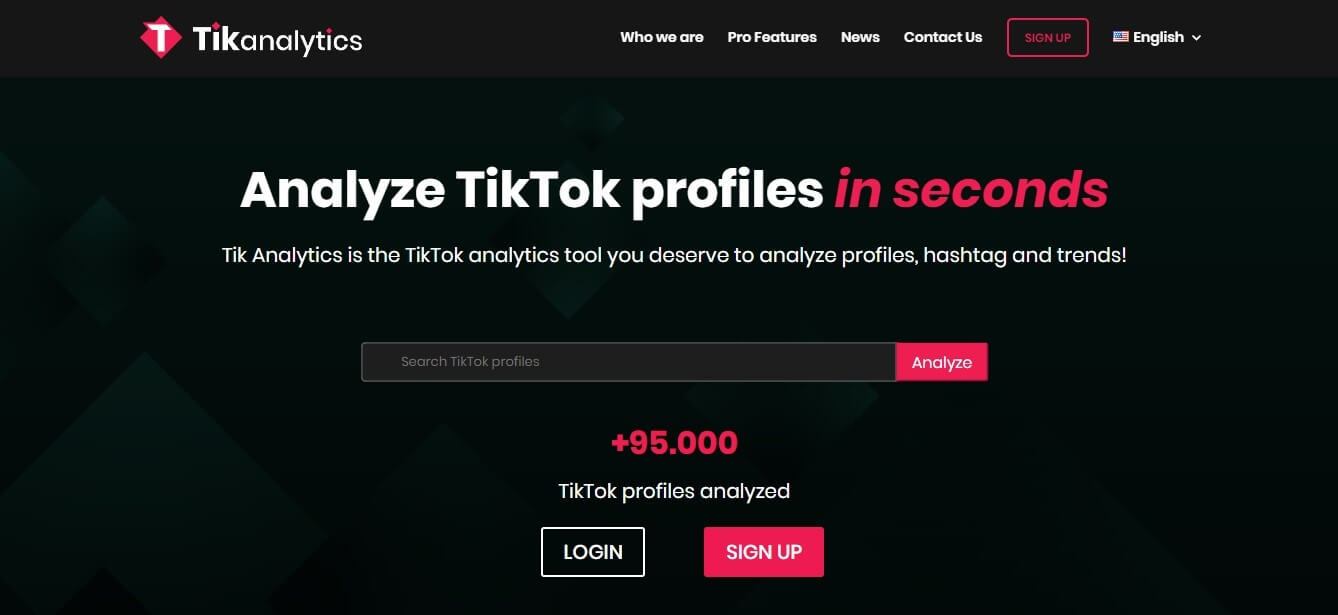
Evaluate campaigns via marketing tool for Tik Tok called Tik Tok Analytics. It is a helpful tool for all social marketers to check for social insights on this popular video sharing platform. It’s singular yet cross-platform with several KPIs, benchmarks, and baselines.
Features
- Users must have a Tik Tok Pro account to access Tik Tok Analytics.
- All the relevant information about the content performance and audience is available over the site.
- The TikTok Analytics dashboard displays Profile Overview, Follower Insights, and Content Insights.
- It helps in forming an effective content strategy after analyzing these points.
Pricing: $20/month
2. Fanbytes

Fanbytes is said to be one of the powerful TikTok tools to find authentic influencers. It uses a combination of Neuro-linguistic programming and machine learning for the purpose. The internal tool helps in searching bios and to discover influencers who have campaigned for different brands.
Features
- The app targets the young audience’s reach between the age group of 13-30 on various social media platforms, including Tik Tok.
- They provide an in-depth way to find influencers for different brands based on audiences’ interests, location, and age groups, etc.
- It also helps in creating Tik Tok profiles.
- After access, you will have full analytics information even when the campaign is running throughout.
Campaign basis Pricing: Minimum £3000.
3. Analisa.io

Analisa.io is another TikTok tool for hashtag and profile analysis. With this tool, you can peep through the profile of any influencer. Analyzing influencers is very important for marketing. However, it is helpful for various agencies such as brand marketers, media publishers, and influencers.
Features
- The platform helps in campaign reporting, overall profile analysis, competitive analysis, follower demographics, influencer mapping, and authenticity checks.
- It is an AI-powered platform to get insights for public profiles, followers, and hashtags.
- Analisa breaks down the analysis of rates into engagement rate, comment rate, and likes rate.
- It also shows posting maps if geotagged, along with audience engagement and posting activity.
Pricing: Pro @ $199.35, Plus @ 109.55, Premium @ 59.35, Basic [Free]
4. Pentos
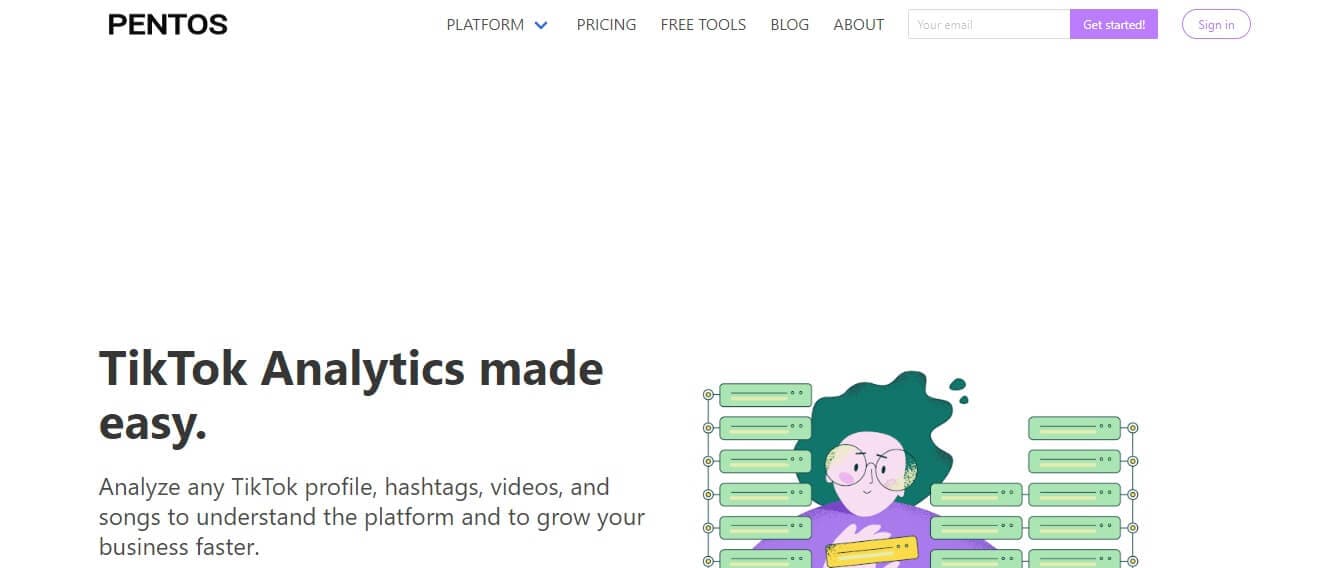
Pentos is said to made TikTok analysis super easy. It gives you an overall review and performance of other TikTok accounts. It’s quite challenging to analyze other TikTok profiles with current API. Thus, you need a specific app such as Pentos for corrective analysis.
You can also get needed insights on trending challenges that appear on the TikTok platform. The free version allows tracking up to three profiles. You need a paid account at $20/month for additional facilities.
Features
- You can also check the insights on trending challenges of Tik Tok via Pentos.
- You can track up to three profiles with Pentos’ basic and free version.
- The discovery of detailed data gets checked in terms of hashtags, songs, Tik Tok public profiles, and different posts.
- It provides an in-depth analysis of the Tik Tok profile, including hearts, views, engagement rates, comments, and so on.
Pricing: It is a free Tik Tok tool to calculate engagement rate and viral score.
Best TikTok Tools to Gain More Following
In this section, we’re going to discuss two hacks with regards to TikTok auto follower and TikTok auto liker. All three tools are going to help you in gaining more followers in natural ways.
1. TokCaptain

TokCaptain is a straightforward Tik Tok tool for ultimate growth. The software offers real followers and likes without worrying about the quality at all. They provide a quite easy-to-use interface with basic yet exciting features.
Features
- You can get started after choosing a plan to target the desired audience.
- Profiles and content get filtered for real-time engagement with followers.
- TokCaptain guarantees immediate results and genuine likes.
Pricing: Education, Professional, Business, and Premium Pricing plans: 100 followers @ $2.99.
2. Fireliker
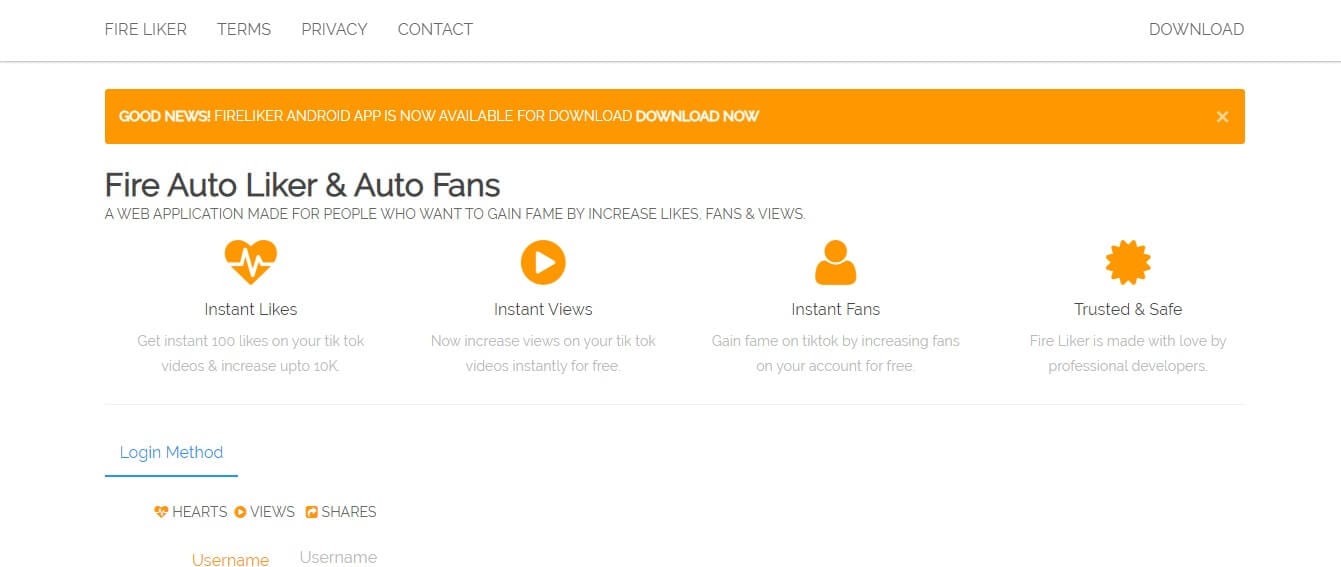
Fireliker TikTok auto liker provides all the safe and secure methods to get instant likes and views on the TikTok account. To get started, you just need to type in username along with specific usual details.
Features
- The easy user interface lets the task done effectively and quickly.
- The procedure is simple yet effective with a follow/unfollow technique.
- You will get instant likes, instant views, and instant fans in a safe and trusted manner.
Pricing: Free
3. Social Viral

Social Viral is another TikTok auto liker that is compatible with both Android and iOS. It’s a decent platform to get real views, followers, and TikTok likes. After signing up with the platform, you can rest assured the growth over them.
Features
- It will help you get the desired results necessary for overall TikTok growth.
- They offer followers, likes, auto-likes, and views.
- This contemporary tool also comes up with trendy and latest ideas every day.
Pricing: 50 followers @ $1.49
Conclusion
So, this is all you need to boost your TikTok account and make it viral. However, while using these TikTok tools, don’t forget to shoot video with ideal equipment so that editing stands out better than others. Remember that TikTok, similar to other social media platforms is a great marketing platform if used correctly. Hence, everything needs certain practice and the use of suitable tools to reach a goal.
Shanoon Cox
Shanoon Cox is a writer and a lover of all things video.
Follow @Shanoon Cox
Shanoon Cox
Mar 27, 2024• Proven solutions
The youth-oriented app called TikTok has already found its place among many users across the globe. It’s not just a lip-syncing platform with lots of followers, likes, and fame. Moreover, it’s a great place for marketing purposes. All of its influencers are using particular TikTok tools to attract handsome sponsorships. It is what the goal and process of making money on TikTok are currently. The need is to use those tools in a channelized manner to boost overall growth on this Chinese app.
After analyzing the growth analytics and behaviors of TikTok influencers, we researched eight must-have TikTok tools for your ultimate success. Without further ado, let’s discuss their versatile features along with price and availability.
Top 8 TikTok Tools for Ultimate Growth
For ease of use and better channelization among each area, we’ve divided these eight tools into three sub-parts, as discussed below.
- Part 1: Best TikTok Tools for Video Editing
- Part 2: Best TikTok Tools for Marketing
- Part 3: Best TikTok Tools to Gain More Following
Best TikTok Tools for Video Editing
In terms of video editing, you must go for two tasks. Apart from the inbuilt video editor of TikTok, we’ll discuss an additional video editor with impeccable qualities.
1. TikTok Built-In Video Editor
Right after video recording on TikTok, you can jump to its interesting inbuilt editing session. It can capably perform basic tasks of adding filters, soundtracks, blurring, and so on. Tapping on + icon will let you present both the recording and editing interface. You can use certain features even while recording video. Tap on Add a sound to go through TikTok’s vast media library.
Features
- There are several options in Beauty, Filters, Timer, Speed, and Flip, etc.
- Turn on the Beauty mode for smoothness and shadow removal.
- Flip is a feature that helps switch the camera mode.
- Playback speed can be changed from 0.1x to 3x i.e., from slow motion to fast motion.
- The next two worth noting features are Trim and Mixer. Tap on Trim to shorten the video length. And Mixer is used to adjusting the playback sound levels.
Pricing: Free
2. Wondershare Filmora Video Editor
Now, let’s check the advanced editing solution by WondershareFilmora. Almost every influencer we checked to use external video editor for making videos that stand out. Furthermore, the upgraded version is loaded with new in-built effects to consider. Whether it’s travel, music, game, business, family, vlog, and education, WondershareFilmora is there to help with advanced yet easy-to-use editing solutions.
Features
- It offers a range of beautiful overlays and filters for exceptional editing.
- They feature a Filmstock with loads of royalty-free audio files, video files, video effects, and stock images, etc. All in all, it’s a handy tool for TikTok video creators.
- If you wish to learn editing and photography skills, simply subscribe to their Video Editing Academy.
- The platform offers 24/7 user-friendly support with helpful tips on growth and other support channels.
Pricing: Perpetual subscription at $69.99.
Best TikTok Tools for Marketing
Marketing is essential, and here are different ways you can advertise your TikTok account.
1. TikTokAnalytics
Evaluate campaigns via marketing tool for Tik Tok called Tik Tok Analytics. It is a helpful tool for all social marketers to check for social insights on this popular video sharing platform. It’s singular yet cross-platform with several KPIs, benchmarks, and baselines.
Features
- Users must have a Tik Tok Pro account to access Tik Tok Analytics.
- All the relevant information about the content performance and audience is available over the site.
- The TikTok Analytics dashboard displays Profile Overview, Follower Insights, and Content Insights.
- It helps in forming an effective content strategy after analyzing these points.
Pricing: $20/month
2. Fanbytes
Fanbytes is said to be one of the powerful TikTok tools to find authentic influencers. It uses a combination of Neuro-linguistic programming and machine learning for the purpose. The internal tool helps in searching bios and to discover influencers who have campaigned for different brands.
Features
- The app targets the young audience’s reach between the age group of 13-30 on various social media platforms, including Tik Tok.
- They provide an in-depth way to find influencers for different brands based on audiences’ interests, location, and age groups, etc.
- It also helps in creating Tik Tok profiles.
- After access, you will have full analytics information even when the campaign is running throughout.
Campaign basis Pricing: Minimum £3000.
3. Analisa.io
Analisa.io is another TikTok tool for hashtag and profile analysis. With this tool, you can peep through the profile of any influencer. Analyzing influencers is very important for marketing. However, it is helpful for various agencies such as brand marketers, media publishers, and influencers.
Features
- The platform helps in campaign reporting, overall profile analysis, competitive analysis, follower demographics, influencer mapping, and authenticity checks.
- It is an AI-powered platform to get insights for public profiles, followers, and hashtags.
- Analisa breaks down the analysis of rates into engagement rate, comment rate, and likes rate.
- It also shows posting maps if geotagged, along with audience engagement and posting activity.
Pricing: Pro @ $199.35, Plus @ 109.55, Premium @ 59.35, Basic [Free]
4. Pentos
Pentos is said to made TikTok analysis super easy. It gives you an overall review and performance of other TikTok accounts. It’s quite challenging to analyze other TikTok profiles with current API. Thus, you need a specific app such as Pentos for corrective analysis.
You can also get needed insights on trending challenges that appear on the TikTok platform. The free version allows tracking up to three profiles. You need a paid account at $20/month for additional facilities.
Features
- You can also check the insights on trending challenges of Tik Tok via Pentos.
- You can track up to three profiles with Pentos’ basic and free version.
- The discovery of detailed data gets checked in terms of hashtags, songs, Tik Tok public profiles, and different posts.
- It provides an in-depth analysis of the Tik Tok profile, including hearts, views, engagement rates, comments, and so on.
Pricing: It is a free Tik Tok tool to calculate engagement rate and viral score.
Best TikTok Tools to Gain More Following
In this section, we’re going to discuss two hacks with regards to TikTok auto follower and TikTok auto liker. All three tools are going to help you in gaining more followers in natural ways.
1. TokCaptain
TokCaptain is a straightforward Tik Tok tool for ultimate growth. The software offers real followers and likes without worrying about the quality at all. They provide a quite easy-to-use interface with basic yet exciting features.
Features
- You can get started after choosing a plan to target the desired audience.
- Profiles and content get filtered for real-time engagement with followers.
- TokCaptain guarantees immediate results and genuine likes.
Pricing: Education, Professional, Business, and Premium Pricing plans: 100 followers @ $2.99.
2. Fireliker
Fireliker TikTok auto liker provides all the safe and secure methods to get instant likes and views on the TikTok account. To get started, you just need to type in username along with specific usual details.
Features
- The easy user interface lets the task done effectively and quickly.
- The procedure is simple yet effective with a follow/unfollow technique.
- You will get instant likes, instant views, and instant fans in a safe and trusted manner.
Pricing: Free
3. Social Viral
Social Viral is another TikTok auto liker that is compatible with both Android and iOS. It’s a decent platform to get real views, followers, and TikTok likes. After signing up with the platform, you can rest assured the growth over them.
Features
- It will help you get the desired results necessary for overall TikTok growth.
- They offer followers, likes, auto-likes, and views.
- This contemporary tool also comes up with trendy and latest ideas every day.
Pricing: 50 followers @ $1.49
Conclusion
So, this is all you need to boost your TikTok account and make it viral. However, while using these TikTok tools, don’t forget to shoot video with ideal equipment so that editing stands out better than others. Remember that TikTok, similar to other social media platforms is a great marketing platform if used correctly. Hence, everything needs certain practice and the use of suitable tools to reach a goal.
Shanoon Cox
Shanoon Cox is a writer and a lover of all things video.
Follow @Shanoon Cox
Also read:
- [New] Social Media's Food Scene TikTok's Top Trends
- [Updated] Exclusive List Affordable Mac Video Editing on TikTok
- [Updated] 2024 Approved Chuckle-Filled The Ultimate List of TikTok Jokes & Riddles
- [Updated] Unlock Creative Expression Adding Descriptive Texts to Your TikTok Videos for 2024
- [New] The Secret Sauce for Successful Self-Clone Campaigns on Social Media's Trending Platform, TikTok for 2024
- [New] From Basic to Brilliant Elevating Your TikTok Profile
- [New] From Spectator to Participant Joining on TikTok Live for 2024
- [Updated] 2024 Approved From Online Sensations to Graphic Gems Top Converters at Your Fingertits
- [New] 2024 Approved Dial Down the Din Quieting Background in Recording
- [New] In 2024, Mastering Legal Compliance in Your TikTok Content Upload
- [New] The Ultimate Guide to Favorite TikTok Emoji Use & Hidden Symbols for 2024
- [Updated] The Essentials of Using TikTok on Both Macs & PCs for 2024
- [Updated] 2024 Approved Surge in Followers Swift TikTok Growth Tricks Unveiled
- 2024 Approved Elude the Invisible Threat Unshadowbanned on TikTok
- In 2024, Effortlessly Acquire TikTok Videos for iPhone without Any Watermarks
- [New] Top 49-Countdown of Viral TikTok Musings for Your Success for 2024
- [New] Swiftly Slide Through Content Advanced Techniques to Accelerate Video Viewing on TikTok for 2024
- [New] In 2024, 95 Sharp Humor in TikTok's Best Joke Threads
- [New] 2024 Approved The Tasty Trail 10 Viral Eats on Social Media
- [New] TikTok's Viral Rhymes A Guide to Popular Rap Songs for 2024
- Becoming One in the TikTok Living Room Your Steps
- [New] Top Players Showcased 10 MVPs on TikTok
- 2024 Approved Decoding Social Media Success - Navigate the Best & Hidden TikTok Glyphs
- TikTok Symbol Guide Enhancing Content Creation for 2024
- From Snaps to Savings on Snapchat
- Boost Your Viewing Efficiency The Ultimate TikTok Fast Forward Method
- [Updated] 2024 Approved Unintended TikTok Reset – How to Get Back Old Videos?
- [New] In 2024, Unleash Creativity with These 5 Advanced TikTok Captioning Techniques
- New AVI Video Cutting Made Easy Top 16 Tools for Windows, MAC, Android, iPhone, and Online for 2024
- In 2024, Hassle-Free Ways to Remove FRP Lock from Huawei P60 Phones with/without a PC
- [New] Precision Gameplay Savings Made Easy with FBX Filming
- [New] Top Gaming Destinations on Android The Elite 15 Simulations for 2024
- S Best Free Green Screen Editors for Mobile Phones
- In 2024, 2 Ways to Transfer Text Messages from Tecno Spark 10 5G to iPhone 15/14/13/12/11/X/8/ | Dr.fone
- Catch or Beat Sleeping Snorlax on Pokemon Go For Apple iPhone 6 Plus | Dr.fone
- [Updated] In 2024, 50 Essential Screen Savers for Online Video Calls
- New In 2024, Get Creative on Android 10 iMovie-Like Video Editing Options
- In 2024, About Huawei Nova Y71 FRP Bypass
- New In 2024, Convert Video Voice to Text Online for Free Fast and Easy Ways
- [New] In 2024, MiniScreen Capture Scrutiny and Replacements
- [New] 2024 Approved Top Pick Prodigious Insta HLV Pages Creators
- How To Unlock a ZTE Blade A73 5G Easily?
- In 2024, Here are Some of the Best Pokemon Discord Servers to Join On Samsung Galaxy A15 4G | Dr.fone
- The Most Useful Tips for Pokemon Go Ultra League On Samsung Galaxy A14 4G | Dr.fone
- [Updated] Plowing Pathways Selecting Superb Simulation Titles
- Full Tutorial to Bypass Your Vivo V27e Face Lock?
- Updated The Sound Choice Handbook Understanding & Selecting Superior Audio Formats for 2024
- Optimal Recorder Application Collection
- How To Enable USB Debugging on a Locked Samsung Galaxy S23+ Phone
- [New] PixelPioneer Mastering the Art of Screen Capture
- New In 2024, Top Video Blur Effects Apps for Mobile Devices
- Can I recover permanently deleted photos from Google
- How to Factory Reset Vivo V29 If I Forgot Security Code or Password? | Dr.fone
- Best Pokemons for PVP Matches in Pokemon Go For Samsung Galaxy XCover 7 | Dr.fone
- Title: "[New] 2024 Approved Banishing Auditory Distractions A Guide on Audacity's Noise Reduction"
- Author: Gary
- Created at : 2024-05-23 07:10:07
- Updated at : 2024-05-24 07:10:07
- Link: https://tiktok-clips.techidaily.com/new-2024-approved-banishing-auditory-distractions-a-guide-on-audacitys-noise-reduction/
- License: This work is licensed under CC BY-NC-SA 4.0.
